
12 Dec 2025
Post by Elijah
Introduction
Replacing your PS4 controller battery can seem daunting but is essential for prolonging your gaming device’s life. Follow this comprehensive guide to locate and replace your PS4 controller’s battery, ensuring uninterrupted gaming sessions.

Understanding the PS4 Controller Battery
The PS4 controller utilizes a lithium-ion battery designed to offer long hours of gaming. With time, the battery’s performance declines, leading to shorter playtimes. Recognizing this decline early is vital to maintaining optimal functionality.
Types of Batteries Used in PS4 Controllers
PS4 controllers are equipped with lithium-ion batteries. These rechargeable batteries ensure efficient energy usage but will eventually show decreased performance. Identifying the specific battery type used in your controller ensures you purchase a compatible replacement, critical for maintaining performance.
Signs Your Battery Needs Replacing
Common indicators of a deteriorating battery include rapid energy loss, inability to hold a charge, and unexpected shutoffs. Recognizing these signs early can prevent game interruptions and ensure your controller remains in good working condition.
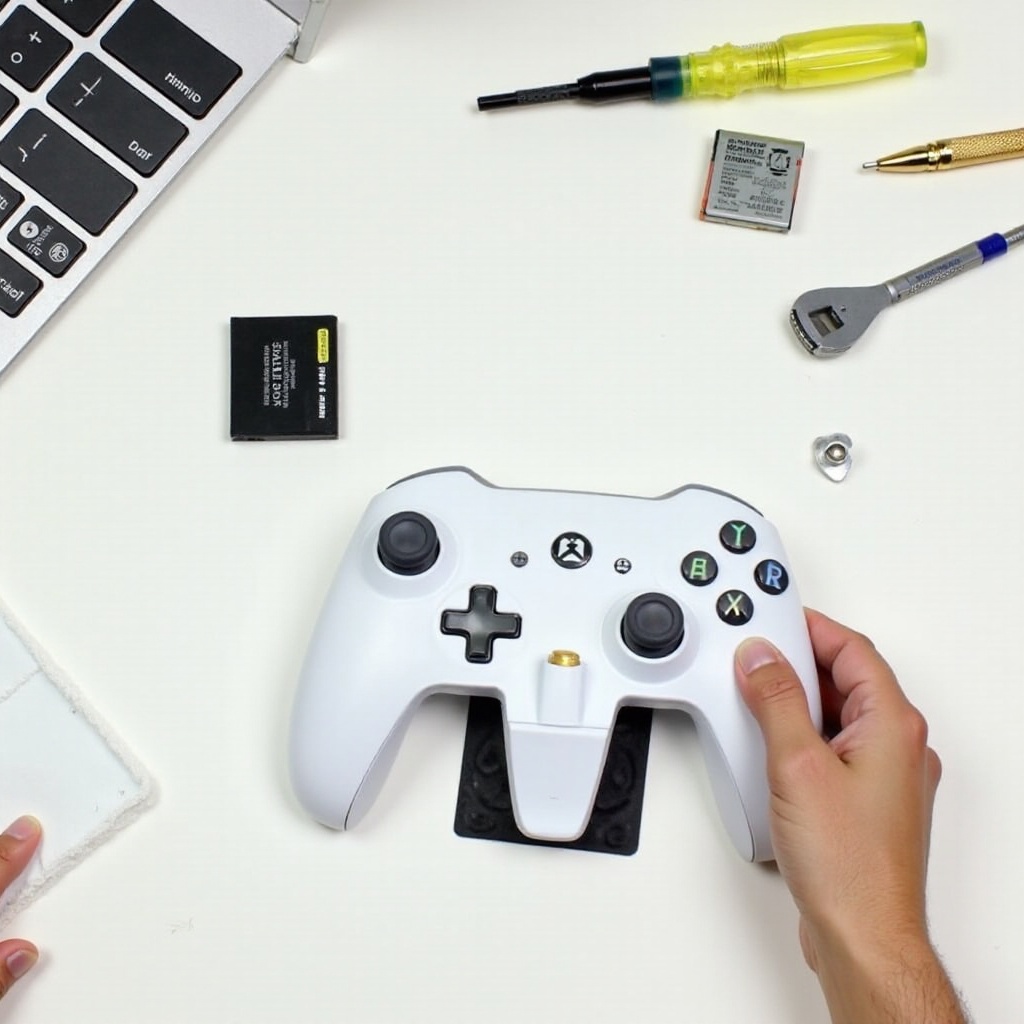
Preparation: Tools and Materials Needed
Before embarking on the replacement process, gathering the correct tools and materials is essential. This preparation will facilitate a smooth transition to your new battery.
Essential Tools for the Job
The necessary tools for replacing your PS4 controller battery include:
– A small Phillips screwdriver
– A plastic prying tool
– A compatible new PS4 controller battery
– A clean working surface
These tools are readily available and crucial for any DIY battery replacement project.
Safety Precautions
Ensure safe handling by:
– Switching off and unplugging the controller before you start.
– Setting up your workspace on a non-conductive, clean, and flat surface.
– Utilizing tools gently to avoid damaging internal components.
Following these precautions helps protect you and your PS4 device, ensuring the replacement process runs smoothly and effectively.
Step-by-Step Guide to Replacing Your PS4 Controller Battery
With all the tools at your disposal, you are now ready to replace your PS4 controller battery. Follow these detailed steps to ensure a seamless replacement process.
Preparing Your Workspace
Ensure your workspace is well-organized and adequately lit with enough space to manage your tools and components. This setup minimizes potential errors and provides a comfortable working environment.
Removing the PS4 Controller Shell
- Use the Phillips screwdriver to loosen the screws on the controller’s back.
- Carefully utilize the prying tool to separate the shell halves, ensuring you avoid damaging the internal clips and connectors.
Proper handling during this process is crucial to maintain the integrity of both the controller’s exterior and its internal components.
Safely Detaching the Old Battery
- After opening the shell, locate the battery pack connected via a small plug.
- Gently disconnect the plug from the internal socket, removing the old battery.
Handle the battery and connection points softly to avoid causing any harm to the delicate circuits and connectors.
Installing the New Battery
- Place the new battery into the designated housing and connect its plug securely to the internal socket.
- Ensure a snug fit with no wires pinched before closing the shell.
Precision in this step ensures the new battery is installed correctly, preparing your controller for immediate use.
Testing and Verification
Following battery installation, verify its successful implementation through these testing steps.
Powering Up Your Controller
Reassemble the controller’s shell by securing all screws, then power it on to confirm operational lights or functionality indicators. This initial step verifies the establishment of a functional connection.
Conducting a Functionality Test
Evaluate the buttons, joysticks, and other functional interfaces for proper operation. This comprehensive functionality check confirms a successful battery replacement, readying your controller for gaming action.
Tips for Extending Your New Battery’s Lifespan
Long-lasting battery performance ensures that your gaming sessions are as intended, uninterrupted. Employ these tips to extend the new battery’s lifespan.
Proper Charging Techniques
Adopt effective charging protocols by:
– Disconnecting the controller when fully charged.
– Avoiding prolonged plugging post full charge.
Maximizing battery efficiency through these techniques prevents unnecessary wear and tear.
Regular Maintenance Tips
Maintain a dust-free and clean controller to ensure components are unobstructed. Routine inspections prevent collection, ensuring functionality remains at an optimum level.

Troubleshooting Common Issues
In the event of post-replacement issues, these troubleshooting techniques can be invaluable.
What to Do if the Controller Doesn’t Turn On
Check the battery connections, reopen the controller, and verify if all plugs are securely attached. Confirming secure connections can often remedy any power-related concerns.
Addressing Other Common Problems
If problems persist, inspect the battery area for signs of unsecured hardware or other obstructions. Confirm all connections and components are intact to prevent operational difficulties.
Conclusion
In conclusion, replacing your PS4 controller battery can extend the device’s lifecycle without additional financial burden. Follow this guide to ensure a seamless installation process, safeguarding future gaming experiences.
Frequently Asked Questions
What tools do I need to replace my PS4 controller battery?
You will need a Phillips screwdriver, a plastic prying tool, and a compatible new battery.
How long should my new PS4 controller battery last?
A new controller battery can last up to five years with proper charging and care.
Can replacing the battery void my warranty?
Yes, self-replacement can void a warranty. Check your warranty terms before proceeding.